
Introduction
In this tutorial, we will show you how to create a Scan-to-Pay Shareable Link dApp on the Celo blockchain. With this dApp, users can quickly and easily pay for goods and services by simply scanning a shareable payment link using their mobile devices.
Using Celo’s decentralized platform for mobile payments, we will guide you through the process of building a smart contract and a web app that generates shareable payment links. We will also show you how to enable users to complete payments by scanning those links with their mobile devices.
Whether you’re a beginner or an experienced blockchain developer, this tutorial will provide you with a comprehensive guide on building a Scan-to-Pay Shareable Link dApp on Celo. So let’s dive in and get started!
Prerequisites
Before you begin this tutorial, there are a few prerequisites you should have:
- Basic programming knowledge: You should have some familiarity with programming concepts and basic coding skills. This tutorial assumes that you have a working knowledge of React JS.
Familiarity with Celo blockchain: While it’s not strictly necessary to have prior experience with Celo, it will be helpful to have a basic understanding of the Celo blockchain and its components, such as the Celo Valora wallet, MetaMask, and the Celo network. - Development environment: You’ll need a development environment set up on your machine. We recommend using Visual Studio Code as your code editor, Node.js and NPM / Yarn for installing dependencies, and Git for version control.
- Celo wallet: You’ll need a Celo wallet to interact with the Celo network. You can create a Celo wallet using the Valora app, which is available for download on the App Store and Google Play. Alternatively, you can use MetaMask mobile wallet too.
- Celo Testnet account and test tokens: You’ll need a Celo Testnet account to test your dApp. You can obtain test tokens from the Celo faucet here, which will enable you to interact with the Testnet.
If you meet these prerequisites, you’re ready to get started building your Scan-to-Pay Shareable Link dApp on Celo!
Requirements
- Node.js and NPM: Node.js is a JavaScript runtime that allows you to run JavaScript code outside of a web browser. NPM (Node Package Manager) is a package manager for Node.js that allows you to easily install and manage dependencies. You can download Node.js and NPM from the official website: here.
- Vite: Vite is a fast and lightweight build tool that is designed to work with modern JavaScript frameworks like React. You can install Vite using NPM by running the following command in your terminal:
npm install -g vite. - Ethers.js: Ethers.js is a JavaScript library for interacting with Ethereum-based blockchains like Celo. You can install Ethers.js using NPM by running the following command in your terminal:
npm install ethers. - Code editor: You will need a code editor to write and edit your code. We recommend using Visual Studio Code, which is a free, open-source code editor with excellent support for JavaScript development. You can download Visual Studio Code from the official website: here.
- Tailwind CSS: Tailwind CSS is a utility-first CSS framework that makes it easy to style your web applications. You can install Tailwind CSS using NPM by running the following command in your terminal:
npm install tailwindcss.
By installing these packages and tools, you will have everything you need to complete the tutorial and build your Scan-to-Pay Shareable Link dApp on Celo using Vite, React, and Ethers.js.
Setting up the starter code
You can clone the starter code from GitHub and get set up with all the required packages for the tutorial.
git clone https://github.com/JovanMwesigwa/scan-qr-to-pay-shareable-link-dapp.git
This will clone the starter project to your local development environment.
Open the project in your favorable IDE, and install the dependencies with:
yarn or npm install.
In your terminal, type yarn run devto run the project in your browser.
Here’s what you should have so far:
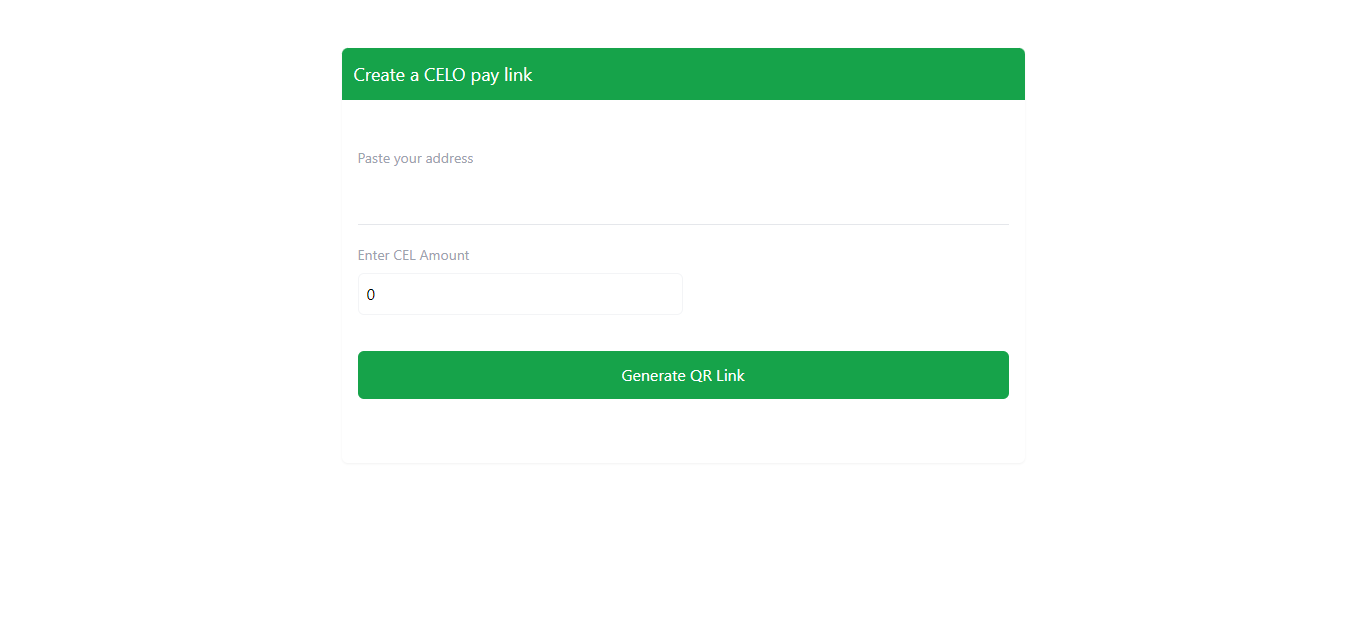
The src folder structure
The src folder has the /pages folder where we have the main Dashboard.jsx page. This will simulate a merchant management dashboard for creating and managing product links.
In the same folder, we have the Pay.jsx page that will display the QR code that will allow users to scan to pay. All the shareable links shared by the merchants will land on this page.
Exploring the Dashboard starter code
Inside the Dashboard.jsx file under the /pages folder, we have some library imports at the top:
import { useState } from "react";
import { useNavigate } from "react-router-dom";
We import the useState function from react to handle multiple state changes in the page and useNavigate() from react-router-dom.
const Dashboard = () => {
  const [address, setAddress] = useState('')
  const [amount, setAmount] = useState(0.0)
  const [error, setError] = useState('')

  const [linkData, setLinkData] = useState(null)
Using useState we handle several useful state variables on the page:
- address: This will be the merchant’s address to receive payment.
- amount: The amount of CELO that the merchant intends to receive from a pay link.
- error: To catch and display any error messages that may result from a failed response and feedback.
- linkData: Handle the created link from the merchant’s entered information.
On the form inputs:
    <label htmlFor="address" className="text-sm text-gray-400 ">
        Paste your address
    </label>
    <input
        type="text"
        value={address}
        onChange={(e) => setAddress(e.target.value)}
        className="w-full border-1 py-4 outline-none border-gray-900"
    />
On the address form input element we set the value prop to the address state variable and the onChange() method to update the address state.
This is the same logic we used for the amount form input element. As shown below:
    <label htmlFor="addredd" className="text-sm text-gray-400 ">
      Enter CEL Amount
    </label>
        <input
          type="number"
          value={amount}
          onChange={(e) => setAmount(e.target.value)}
          placeholder="0.0"
          className="w-1/2 border-[0.5px] py-2 rounded-md px-2 mt-2 outline-none border-gray-100"
        />
The amount form input elements update the amount state, as defined in the code above.
Closing off the form is the button that generates the code by calling the generateLink() that we’ll define later on:
<button
  onClick={generateLink}
  className="bg-green-600  my-4 w-full p-3 rounded-md text-white"
>
  Generate QR Link
</button>
After generating the payment link, we want to display it so that the merchant can see and copy it.
To do this, we’ve defined a clickable div link that we make sure only populates when the link is generated, as shown below:
{
  linkData && !error && (
    <div onClick={openPayLink} className="text-xs text-blue-400 cursor-pointer">
      Open QR link
    </div>
  );
}
The openPayLink is a method that when clicked, will navigate the user to a payment page with a scannable link QR code.
Generate Link
The Generate QR Link button directly calls the generateLink function below:
const generateLink = () => {
  if (!address || amount === 0) {
    setError("Make sure you complete all fields!");
    return;
  }

  setError("");

  const data = { address: address, amount: amount };
  const encodedData = encodeURIComponent(JSON.stringify(data));

  setLinkData(encodedData);
};
The function, first verifies that all forms have been populated with information and that the user is not submitting empty information.
Inside the pay link URL, we need to pass in the merchant’s address and the amount of CELO that they are accepting for payment. These are passed inside that pay link URL that will be shared.
For React to allow us to pass the data object as props in the URL, we need to stringify the data from an object to a string.
As shown in the line:
    const data = { address: address, amount: amount }
    const encodedData = encodeURIComponent(JSON.stringify(data))

    setLinkData(encodedData)
  }
Finally, we define the openPayLink function that will allow the merchants to navigate to the pay page by passing in the link params in the URL.
const openPayLink = () => {
  navigate(`pay/${linkData}`);
};
Exploring the Pay page
The Pay.jsx is a very simple page. It only extracts the address and amount from the URL parameters and displays them in a QR element in the browser.
To see this page, enter an address and amount in the dashboard page, press generates link button, and click the Open QR link link above the button.
As shown below:

Scan to pay functionality
At the top of the Pay.jsx file, we have several libraries imported:
import React, { useEffect, useState } from "react";
import EthereumQRPlugin from "ethereum-qr-code";
import QRCode from "qrcode.react";
import { useParams } from "react-router-dom";
import { ethers } from "ethers";
EthereumQRPlugin: When we created the transaction to be signed by the user’s wallet, all the QR code does is hold the created transaction instance that the user’s wallet will sign to make the payment. Theethereum-qr-codepackage helps to transform the transaction data intodataUrlfor the user’s wallet signs. It’s installed via npm and helps to hold the signable transaction instance.QRCode: The generateddataUrlfromethereum-qr-codeis displayed to the UI using theqrcode.reactpackage.useParams: To extract the information about the required transaction from the link-URL, we use theuseParamsmethod fromreact-router.ethers: This will help us convert the amount to Wei.
The first thing we need to do is extract the merchant’s address and pay the amount from the URL and parse it.
const Pay = () => {
  const { session } = useParams()
  let decodedData = JSON.parse(decodeURIComponent(session))
Defining a qrData state variable will allow us to save the instance of the created transaction to be signed.
const [qrData, setQrData] = useState();
As soon as the user navigates to the payment page, we assume that they are ready to scan the QR code with their mobile phone. So we need immediately display the QR on the page.
To achieve this, we define a generateQrCode function and call it in the useEffect function, so the code is generated on the initial render of the page.
useEffect(() => {
  generateQRCode();
}, [decodedData]);
Using decodedData as a dependency in useEffect will allow the page to update whenever there’s a change in the link parameters.
Generate QR Code
The generateQrCode function uses the ethereum-qr-code .toDataUrl() method to generate a URL of the transaction.
toDataUrl takes in a transaction object similar to what ethers js does with the transaction object, where we define the merchant’s address, value, and the chainId of the network that will hold the transaction. In this case, we’re using celo’s test network alfajores which has a chainId of 44787.
This then handles a promise using the .then() where we successfully set the created code to the qrData state variable.
As shown in the code:
const generateQRCode = async () => {
  const qrData = qr.toDataUrl({
    to: decodedData.address,
    value: ethers.parseEther(decodedData.amount),
    chainId: 44787,
  });

  qrData.then((code) => {
    console.log("Your QR id generated:", code.value);
    setQrData(code.value);
  });
};
Testing out the code:

On the initial page render, the generateQRCode function is called and a dataUrl is created and logged in the console.
Code Created Output:

The paid link is successfully creating a scannable pay link QR code.
Scanning the code
Let’s try to scan the code with a mobile wallet.
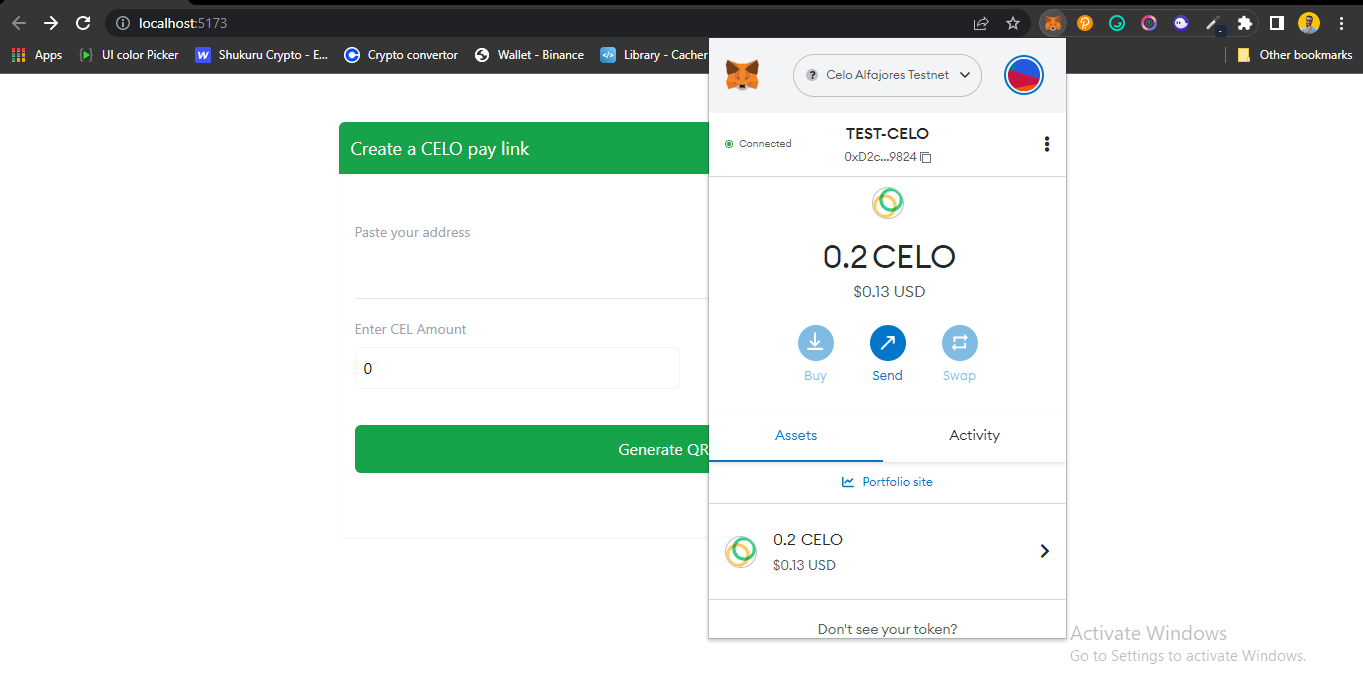
Depending on the wallet that you are using, make sure that it’s connected to the required network that you’re testing from. In my case, am using meta mask’s mobile wallet from PlayStore because it supports the Celo alfajores network.
You also need to have a few funds in your mobile wallet for the transaction to successfully go through. You can get from Celo’s test faucet here
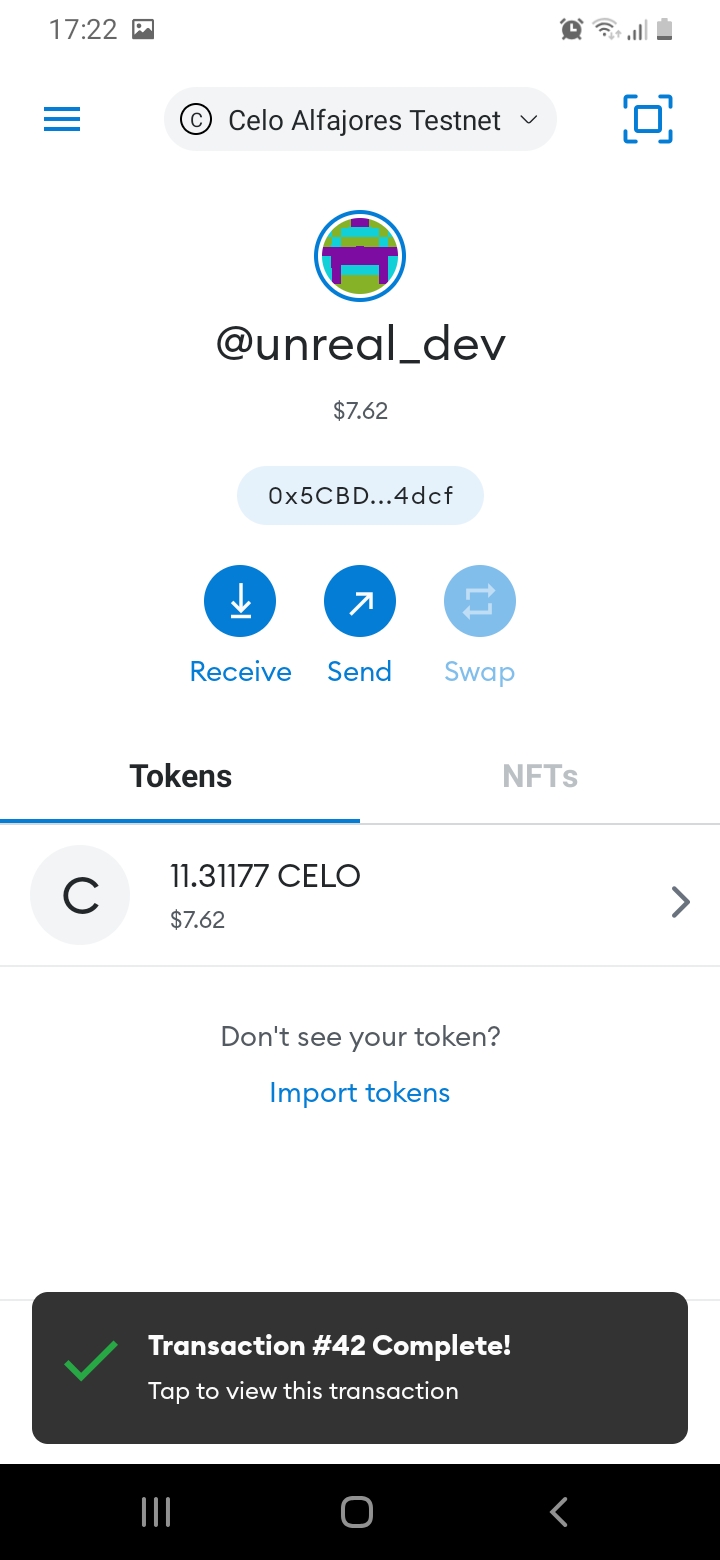
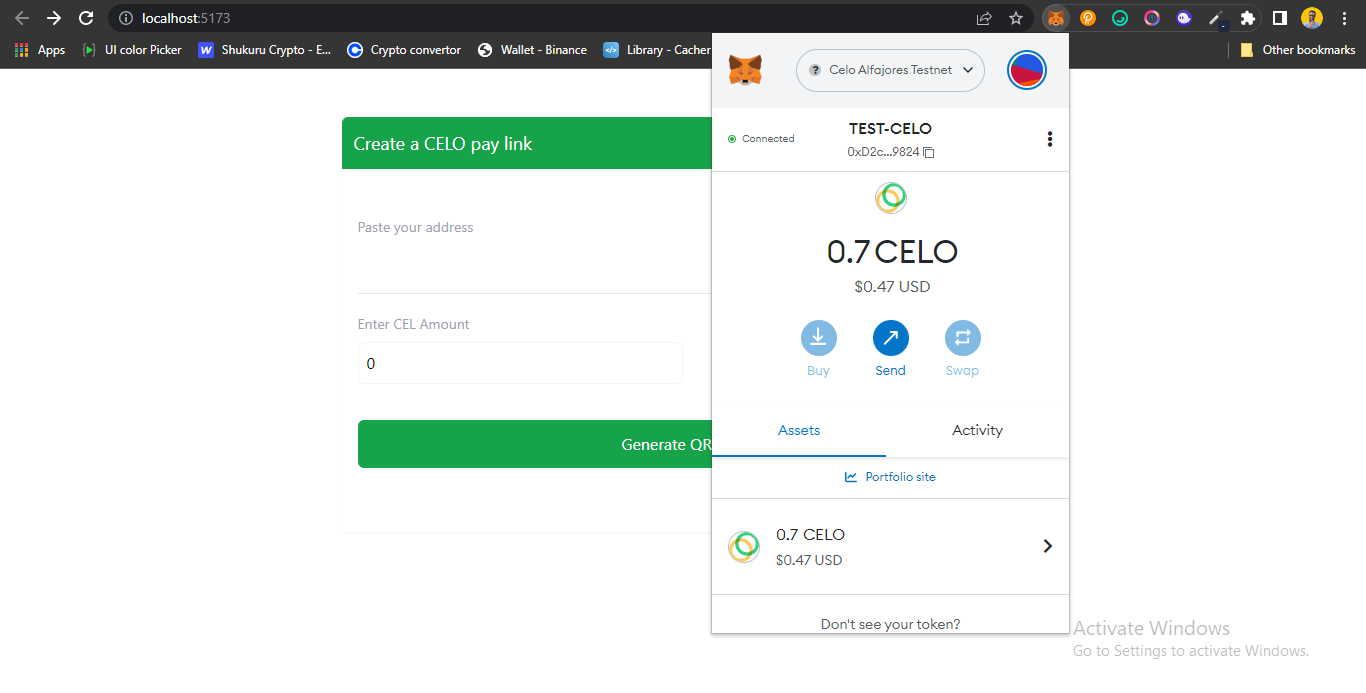
Using the metaMask account in chrome as the merchant with an initial balance of 0.2CELO.
And the user’s mobile wallet on android, with a balance of 11.81229 CELO
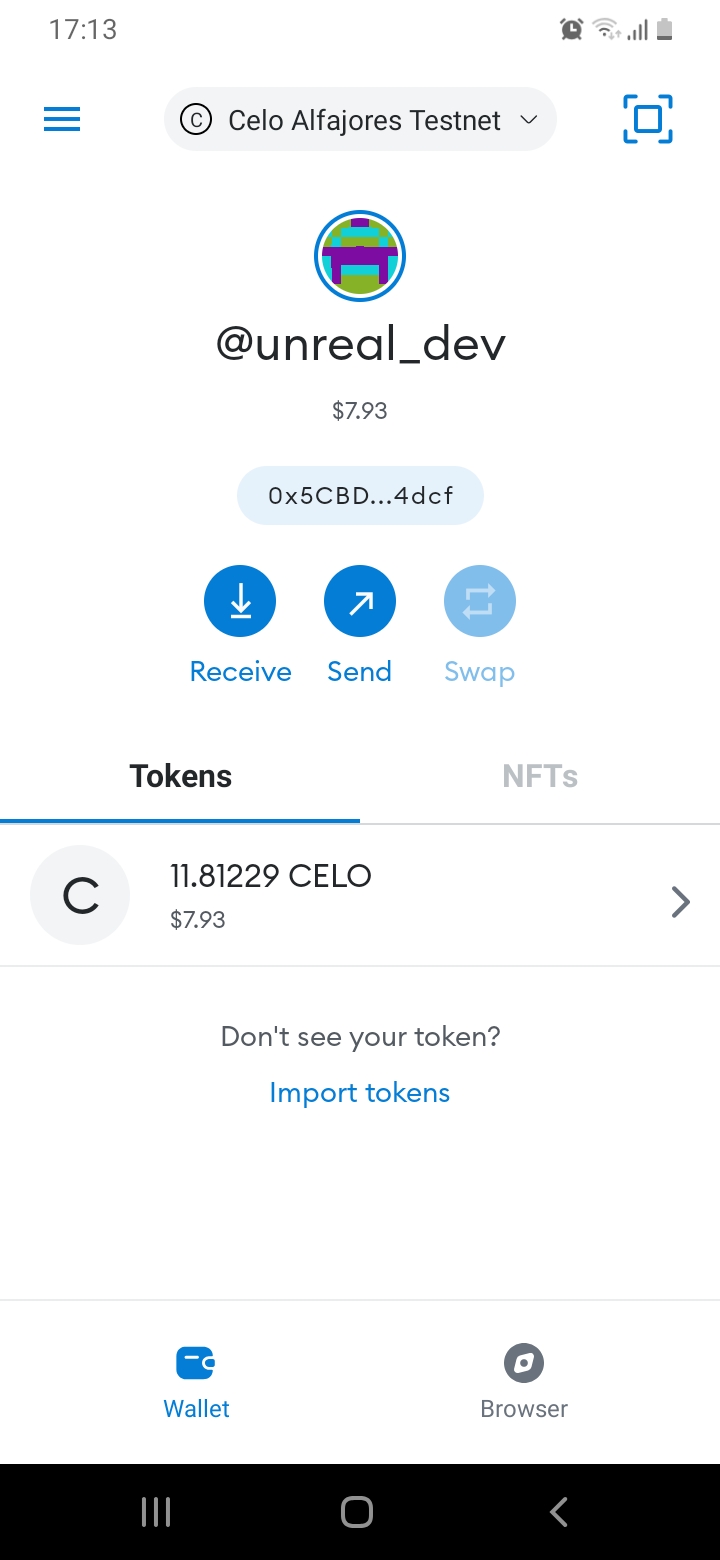
Let’s try to create a payment link of 0.5CELO from the merchant, and then pay it from the mobile app.
This successfully creates a QR code, that can be signed using the mobile wallet.

On scanning the code, we’re given a summary of the transaction details with the merchant’s address, balance, transaction cost, and gas price:
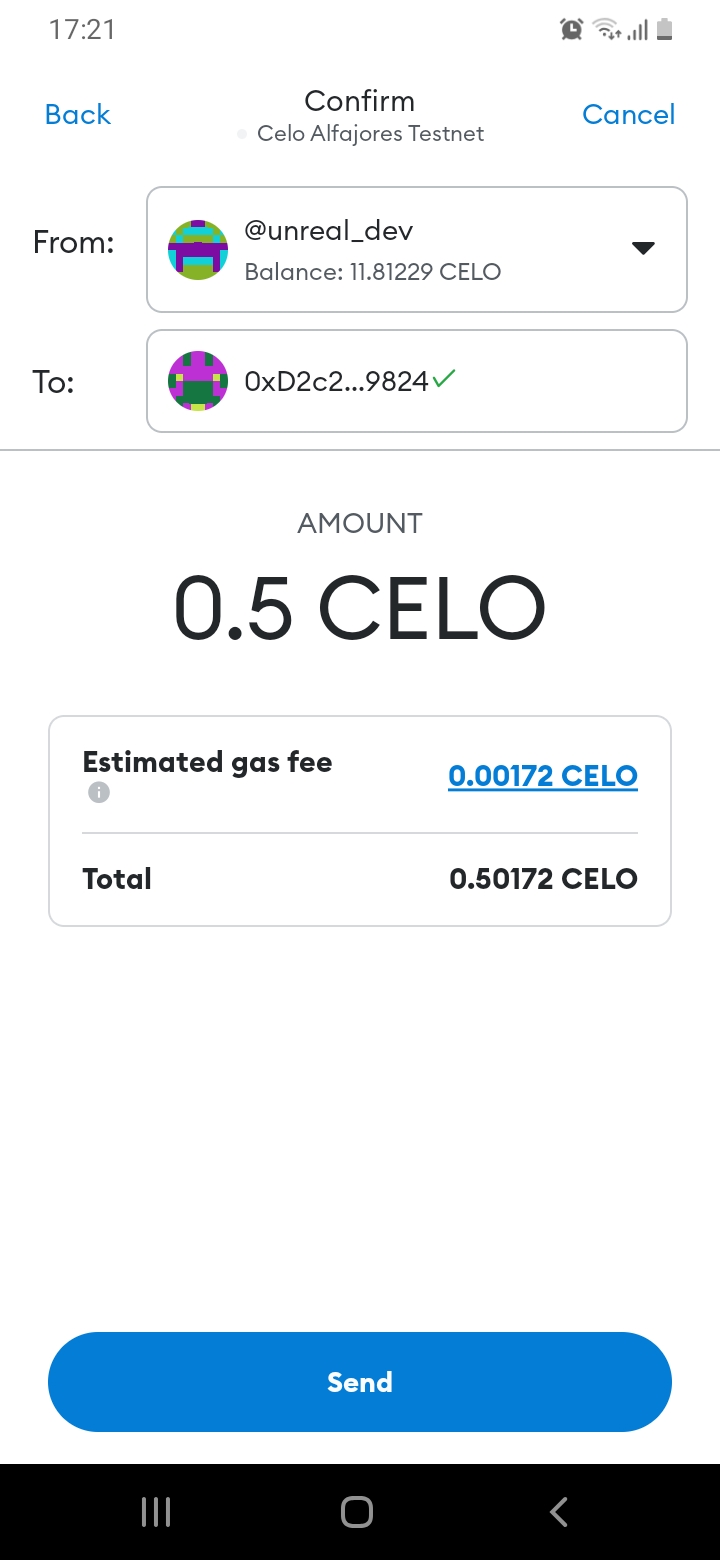
When we confirm the transaction:
The transaction was successful!
We can see the merchant’s wallet has received all the 0.5CELO in their browser wallet.
The transaction we successfully registered on the block explorer:
Tx Hash: 0x7d9…ceb6
Conclusion
Building a scan-to-pay shareable link dApp on the Celo blockchain is a great way to explore the potential of decentralized finance (DeFi) and gain hands-on experience with key concepts like token transfers and QR code scanning. By following this tutorial, you have learned how to leverage the Celo platform to create a simple and user-friendly payment experience for your users. We hope that this tutorial has inspired you to continue exploring the exciting world of blockchain development and DeFi applications.
Next Steps
Now that you have built your dApp, here are a few next steps you can take to continue exploring the possibilities of DeFi development.
- Test your dApp thoroughly to ensure that it works as expected and identify any potential issues or bugs that need to be addressed.
- Explore ways to expand your dApp by adding new features, such as the ability to send and receive other tokens or integrate with other DeFi protocols.
- Join the Celo community to connect with other developers, learn about new tools and resources, and stay up to date on the latest developments in the ecosystem.
- Consider deploying your dApp to a testnet or mainnet to make it available to a wider audience and gain real-world feedback.
- Continue learning about blockchain development and DeFi by exploring additional tutorials, courses, and resources to deepen your knowledge and skills.
About the Author
Created by Jovan Mwesigwa B, Blockchain, Solidity developer
Reach out:
- Twitter: @unreal_joova
- Github: JovanMwesigwa
- Linkedin: JovanMwesigwa
References
- Celo Faucet | Test Funds
- Ethers JS | Ethers Documentation
- Vite React | Vite Documentation
- Project Code GitHub