
 Introduction
Celo is an open-source blockchain platform that aims to make financial systems more accessible to people worldwide. Smart contracts are a key feature of Celo, as they allow for the creation of decentralized applications and the execution of complex financial transactions. Foundry is a development tool that simplifies the process of building and deploying smart contracts on the Celo blockchain. In this guide, we will walk you through the process of deploying smart contracts on Celo using Foundry.
🗈 Prerequisites
Before you can deploy smart contracts on Celo using Foundry, you need to have the following prerequisites:
- A basic understanding of smart contracts and their deployment process
- Node.js and npm installed on your computer
- A Celo wallet with testnet CELO tokens
- Foundry CLI installed on your computer
- Step 1: Create a new project
- To create a new project using Foundry, you need to run the following
Installing foundry on system
On Linux and macOS
If you use Linux or macOS, there are two different ways to install Foundry.
Install the latest release by using foundryup
- This is the easiest option for Linux and macOS users.
Open your terminal and type in the following command:
curl -L https://foundry.paradigm.xyz | bash
This will download foundryup. Then install Foundry by running:
foundryup
If everything goes well, you will now have four binaries at your disposal: forge, cast, anvil, and chisel.
- If you use macOS and face the error below, you need to type brew install libusb to install the Library
dyld[32719]: Library not loaded: /usr/local/opt/libusb/lib/libusb-1.0.0.dylib
To update foundryup after installation, simply run
foundryupagain, and it will update to the latest Foundry release. You can also revert to a specific version of Foundry withfoundryup -v $VERSION.
Building from source
To build from source, you need to get Rust and Cargo. The easiest way to get both is by using rustup.
- On Linux and macOS, this is done as follows:
curl https://sh.rustup.rs -sSf | sh
It will download a script and start the installation.
On Windows, build from the source
If you use Windows, you need to build from the source to get Foundry.
Download and run rustup-init from rustup.rs. It will start the installation in a console.
If you encounter an error, it is most likely the case that you do not have the VS Code Installer which you can download here and install.
After this, run the following to build Foundry from the source:
cargo install --git https://github.com/foundry-rs/foundry foundry-cli anvil chisel --bins --locked
To update from the source, run the same command again.
Deploying smart contract using foundry
- Step 1 : Create Project using
forgecommand.

forge init my-project
once the project is created, use commands to check if everything is working correctly
This will create a new project folder named “my-project” in your current directory. You can replace “my-project” with any name you prefer.

cd my-project && forge build
- Step 2: Write your smart contract
Inside your project folder, you will find a folder named “src”. This is where you will write your smart contract code. For example, let’s create a simple smart contract that stores a string:
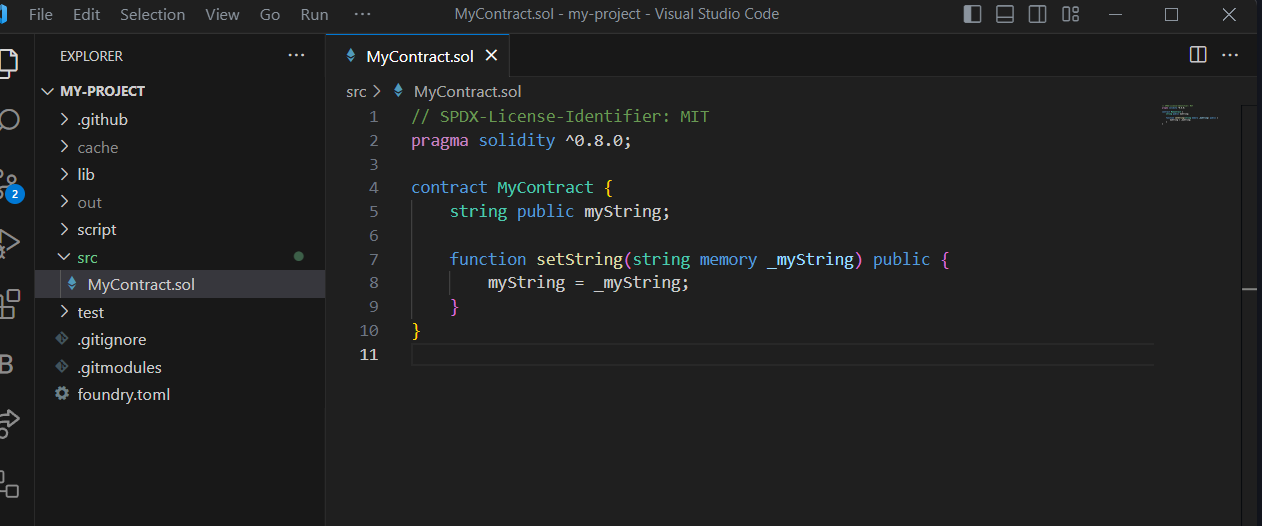
// SPDX-License-Identifier: MIT

pragma solidity ^0.8.0;

contract MyContract {

string public myString;

function setString(string memory _myString) public {

myString = _myString;

}

}
Save this code in a new file named “MyContract.sol” inside the “contracts” folder.
- Step 3: Compile your smart contract
To compile your smart contract, you need to run the following command in your terminal:

forge compile
if you found any error you need to delete counter.sol in test folder.
This will compile your smart contract code and generate the necessary artifacts in a folder named “out” inside your project folder.
- Step 4: Deploy your smart contract
To deploy your smart contract on the Celo blockchain, you need to run the following command in your terminal:

forge create --rpc-url https://alfajores-forno.celo-testnet.org --private-key <privatekey> src/MyContract.sol:MyContract
Forge can deploy smart contracts to a given network with the forge create command.
Some options we can use with forge create while deploying the contract
-
—rpc-url : Rpc URL of the network on which we want to deploy our contract (in our case we will be using the RPC URL of polygon mumbai testnet)
-
-constructor-args : Pass arguments to the constructor
-
-private-key : Private key of deployers wallet
We can optionally pass --verify && --etherscan-api-key if we want to verify our contract
Conclusion
Deploying smart contracts on Celo using Foundry is a simple and straightforward process that requires only a few steps. By following this step-by-step guide, you can create, compile, deploy, and interact with your own smart contracts on the Celo blockchain.
About Author
Hi! My name is Kunal Dawar and I am a Full Stack web2/web3 Developer. I have participated in numerous hackathons and have been fortunate enough to win many of them.
One thing that I am truly passionate about is creating things that are reliable and don’t break easily. I believe that creating high-quality products is important not only for the users but also for the overall growth and success of a business.
In my free time, I enjoy learning about new technologies and staying up-to-date with the latest trends in the field. I also love to share my knowledge with others and mentor those who are interested in pursuing a career in web development.