
Introduction
Decentralized identity solutions are essential to ensuring privacy, security, and trust in the digital world. By empowering individuals to control their data and how it is used, we can eliminate reliance on centralized data repositories that are vulnerable to attacks and misuse. In this tutorial, we will guide developers through the process of creating a decentralized identity solution using the Celo blockchain. We will explore concepts such as decentralized identifiers (DIDs), verifiable credentials, and identity management, and demonstrate how to implement these features in a Celo-based application.
Prerequisites
Before starting this tutorial, you should have a basic understanding of blockchain technology, smart contracts, and the Celo platform. Familiarity with Solidity, Remix, Truffle, Celo SDK, JavaScript, and Web3.js is also recommended. If you need to brush up on these topics, consider reviewing the following resources:
- Celo Developer Documentation
- Solidity Documentation
- Truffle Suite Documentation
- Web3.js Documentation
Additionally, you will need a Celo account and some testnet CELO tokens to interact with the Celo network. Create one here.
Requirements
Before diving into the tutorial, ensure you have the following software installed on your computer:
- Node.js (version 12.x or higher)
- Truffle (version 5.x or higher)
- Celo CLI (version 0.0.60 or higher)
- A modern web browser with MetaMask extension installed
- A code editor, such as Visual Studio Code, Atom, or Sublime Text.
With these tools in place, we can begin developing our decentralized identity solution on the Celo platform. Note the installation of these tools will not be covered in this tutorial.
Creating a DID Registry Smart Contract
Initializing the Project
Start by creating a new directory for your project and navigate to it using the terminal:
    mkdir celo-did
    cd celo-did
Next, initialize a new Truffle project and install the necessary dependencies:
    truffle init
    npm init -y
    npm install --save @Celo_Academy/contractkit web3
This will create a new Truffle project with the following directory structure:
celo-did/
├── contracts/
├── migrations/
├── test/
└── truffle-config.js
Writing the Smart Contract
Create a new file named DIDRegistry.sol in the contracts directory of your project. Then, implement the DID Registry smart contract using Solidity:
    //SPDX-License-Identifier: MIT
    pragma solidity ^0.8.0;

    contract DIDRegistry {
        event DIDAttributeChanged(
            address indexed identity,
            bytes32 indexed name,
            bytes value,
            uint256 validTo,
            uint256 previousChange
        );

        mapping(address => mapping(bytes32 => DIDAttribute)) private data;

        struct DIDAttribute {
            bytes value;
            uint256 validTo;
            uint256 previousChange;
        }

        function setAttribute(
            bytes32 _name,
            bytes memory _value,
            uint256 _validTo
        ) public {
            DIDAttribute storage attr = data[msg.sender][_name];
            attr.value = _value;
            attr.validTo = _validTo;
            attr.previousChange = block.number;
            emit DIDAttributeChanged(msg.sender, _name, _value, _validTo, block.number);
        }

        function getAttribute(address _identity, bytes32 _name)
            public
            view
            returns (
                bytes memory value,
                uint256 validTo,
                uint256 previousChange
            )
        {
            DIDAttribute storage attr = data[_identity][_name];
            value = attr.value;
            validTo = attr.validTo;
            previousChange = attr.previousChange;
        }
    }
This contract defines a DID (Decentralized Identifier) registry. It allows users to set and get attributes associated with their identity. The setAttribute function sets a new attribute value for the caller’s identity. The getAttribute function retrieves the value, validity period, and previous change block number of an attribute associated with a given identity and attribute name. The contract emits an event DIDAttributeChanged whenever an attribute is set.
Compiling and Deploying the Contract
In the migrations directory, create a new file named 2_deploy_did_registry.js and add the following code to deploy the DIDRegistry contract:
const DIDRegistry = artifacts.require("DIDRegistry");

module.exports = function (deployer) {
  deployer.deploy(DIDRegistry);
};
Update the truffle-config.js file to include the Celo network configuration:
const ContractKit = require("@Celo_Academy/contractkit");
const Web3 = require("web3");

const web3 = new Web3("https://alfajores-forno.celo-testnet.org");
const kit = ContractKit.newKitFromWeb3(web3);

// Add your private key and MetaMask account address
const privateKey = "your_private_key";
const accountAddress = "your_metamask_account_address";

kit.addAccount(privateKey);

module.exports = {
  networks: {
    development: { host: "127.0.0.1", port: 7545, network_id: "*" },
    celo: {
      provider: kit.connection.web3.currentProvider,
      network_id: 44787,
      from: accountAddress,
      gas: 6721975,
      gasPrice: 20000000000,
    },
  },
  compilers: {
    solc: {
      version: "0.8.0",
    },
  },
};
Replace your_private_key and your_metamask_account_address with your own private key and MetaMask account address, respectively.
Now, compile the smart contract and deploy it to the Celo Alfajores test network:
  truffle compile
  truffle migrate --network celo
You should see something like this:
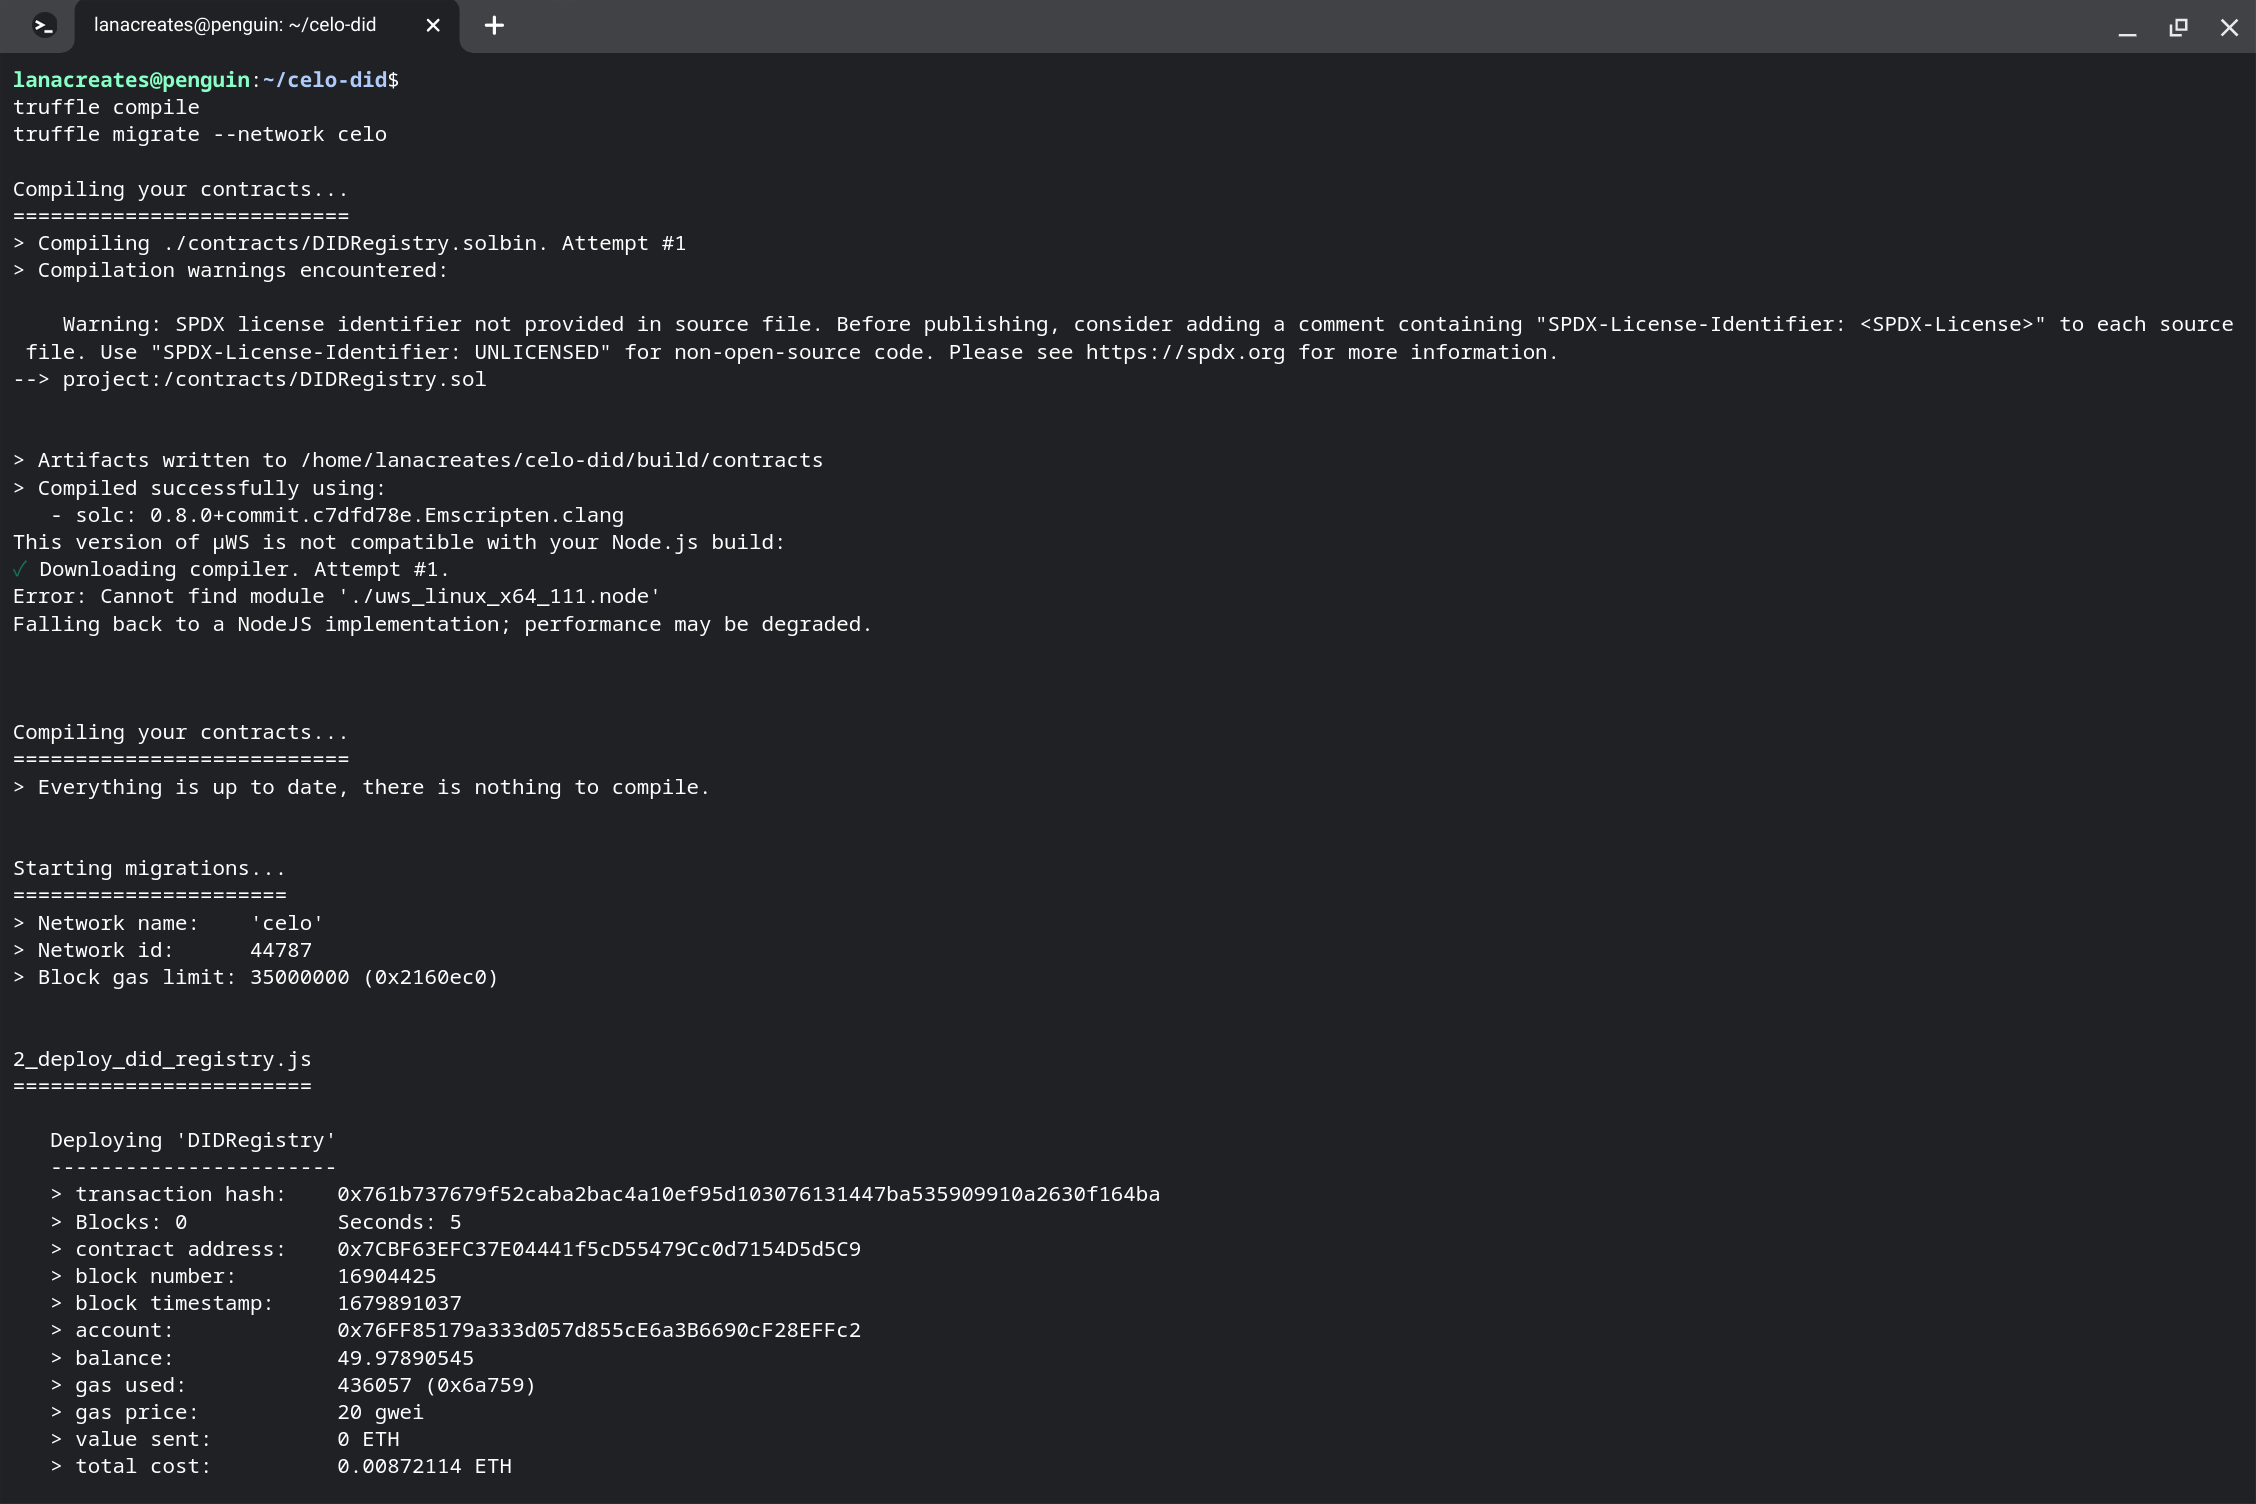
The warning we received is regarding the SPDX license identifier not being provided in the source file. SPDX is a standard format for communicating licenses and copyrights associated with an open-source software package.
To address this warning, you should add a comment to the top of the DIDRegistry.sol file that includes an SPDX license identifier. The comment should contain the following line: // SPDX-License-Identifier: <SPDX-License-Identifier>
In my case, I am using the MIT license, my updated contract reflects that.
Take note of the deployed contract address for later use.
Building the Decentralized Identity Application
Setting up the Frontend
Create a new directory named client in your project’s root directory and navigate to it:
  mkdir client
  cd client
Initialize a new React application using create-react-app:
npx create-react-app .
Install the required dependencies:
npm install @Celo_Academy/contractkit web3 @material-ui/core @material-ui/icons
You might run into this error:

The error indicates there is a conflict in the dependencies. Specifically, @material-ui/core requires a version of React that is different from the version you have installed (react@18.2.0).
We can try running npm install with the --force flag or --legacy-peer-deps flag to override the dependency conflict and install the packages, but this could potentially result in broken dependencies.
A better solution would be to update our React version to match the required version (^16.8.0 || ^17.0.0). We can do this by modifying our package.json file to use the correct version of React, and then running npm install again.
Implementing the Application
In the src directory, create a new file named CeloDID.js. This file will contain the main application logic. Begin by importing the necessary dependencies and the DIDRegistry ABI:
import React, { useState, useEffect } from "react";
import { ContractKit, newKit } from "@Celo_Academy/contractkit";
import Web3 from "web3";
import DIDRegistryABI from "../build/contracts/DIDRegistry.json";
import {
  Button,
  Container,
  TextField,
  Typography,
  Grid,
  CircularProgress,
} from "@material-ui/core";
import { Alert } from "@material-ui/lab";
import { CheckCircle, Error } from "@material-ui/icons";
const CeloDID = () => {
  // State variables and hooks
  // Main logic and event handlers
  // Render components
};
export default CeloDID;
Next, implement the state variables and hooks to manage the connection to the Celo network, user accounts, contract instances, and user input:
// State variables and hooks
const [web3, setWeb3] = useState(null);
const [account, setAccount] = useState(null);
const [contract, setContract] = useState(null);
const [loading, setLoading] = useState(true);
const [message, setMessage] = useState(null);
const [name, setName] = useState("");
const [value, setValue] = useState("");
const [validTo, setValidTo] = useState(0);
Then, implement the main logic and event handlers for connecting to Celo, setting attributes, and getting attributes:
// Main logic and event handlers
useEffect(() => {
  const connectCelo = async () => {
    if (window.celo) {
      try {
        const kit = newKit("https://alfajores-forno.celo-testnet.org");
        const web3 = kit.web3;
        setWeb3(web3);

        // Request account access
        await window.celo.enable();

        const accounts = await web3.eth.getAccounts();
        setAccount(accounts[0]);

        const networkId = await web3.eth.net.getId();
        const deployedNetwork = DIDRegistryABI.networks[networkId];
        const instance = new web3.eth.Contract(
          DIDRegistryABI.abi,
          deployedNetwork && deployedNetwork.address
        );
        setContract(instance);
        setLoading(false);
      } catch (error) {
        console.error("Error connecting to Celo:", error);
        setLoading(false);
      }
    } else {
      alert("Celo extension not found!");
      setLoading(false);
    }
  };
  connectCelo();
}, []);

const handleSetAttribute = async () => {
  setLoading(true);
  try {
    const tx = await contract.methods
      .setAttribute(
        Web3.utils.stringToHex(name),
        Web3.utils.stringToHex(value),
        validTo
      )
      .send({ from: account });
    setMessage({
      type: "success",
      text: `Attribute set! Transaction hash: ${tx.transactionHash}`,
    });
  } catch (error) {
    setMessage({
      type: "error",
      text: `Error setting attribute: ${error.message}`,
    });
  }
  setLoading(false);
};

const handleGetAttribute = async () => {
  setLoading(true);
  try {
    const result = await contract.methods
      .getAttribute(account, Web3.utils.stringToHex(name))
      .call();
    const hexValue = Web3.utils.hexToUtf8(result.value);
    setMessage({
      type: "success",
      text: `Attribute: ${name}, Value: ${hexValue}, ValidTo: ${result.validTo}`,
    });
  } catch (error) {
    setMessage({
      type: "error",
      text: `Error getting attribute: ${error.message}`,
    });
  }
  setLoading(false);
};
Finally, render the components for the user interface, including form fields, buttons, and messages:
// Render components
return (
  <Container>
    <Typography variant="h4">Celo Decentralized Identity</Typography>
    {loading ? (
      <CircularProgress />
    ) : (
      <>
        <Grid container spacing={3}>
          <Grid item xs={12} sm={6}>
            <TextField
              label="Attribute Name"
              value={name}
              onChange={(e) => setName(e.target.value)}
              fullWidth
            />
          </Grid>
          <Grid item xs={12} sm={6}>
            <TextField
              label="Attribute Value"
              value={value}
              onChange={(e) => setValue(e.target.value)}
              fullWidth
            />
          </Grid>
          <Grid item xs={12}>
            <TextField
              label="Valid To (Block Number)"
              type="number"
              value={validTo}
              onChange={(e) => setValidTo(e.target.value)}
              fullWidth
            />
          </Grid>
          <Grid item xs={6}>
            <Button
              variant="contained"
              color="primary"
              onClick={handleSetAttribute}
            >
              Set Attribute
            </Button>
          </Grid>
          <Grid item xs={6}>
            <Button
              variant="contained"
              color="secondary"
              onClick={handleGetAttribute}
            >
              Get Attribute
            </Button>
          </Grid>
        </Grid>
        {message && (
          <Alert
            severity={message.type}
            icon={message.type === "success" ? <CheckCircle /> : <Error />}
            style={{ marginTop: "1rem" }}
          >
            {message.text}
          </Alert>
        )}
      </>
    )}
  </Container>
);
Now, update the src/App.js file to include the CeloDID component:
import "./App.css";
import CeloDID from "./CeloDID";

function App() {
  return (
    <div className="App">
      <CeloDID />
    </div>
  );
}

export default App;
To launch the app created from this tutorial, follow these steps:
-
Navigate to the root directory of your project in the terminal.
-
Run the command npm start to start the React application.
-
The app should open automatically in your default browser. If not, you can access it at http://localhost:3000.
-
Ensure that MetaMask / Celo Extension Wallet is installed and connected to the Celo test network.
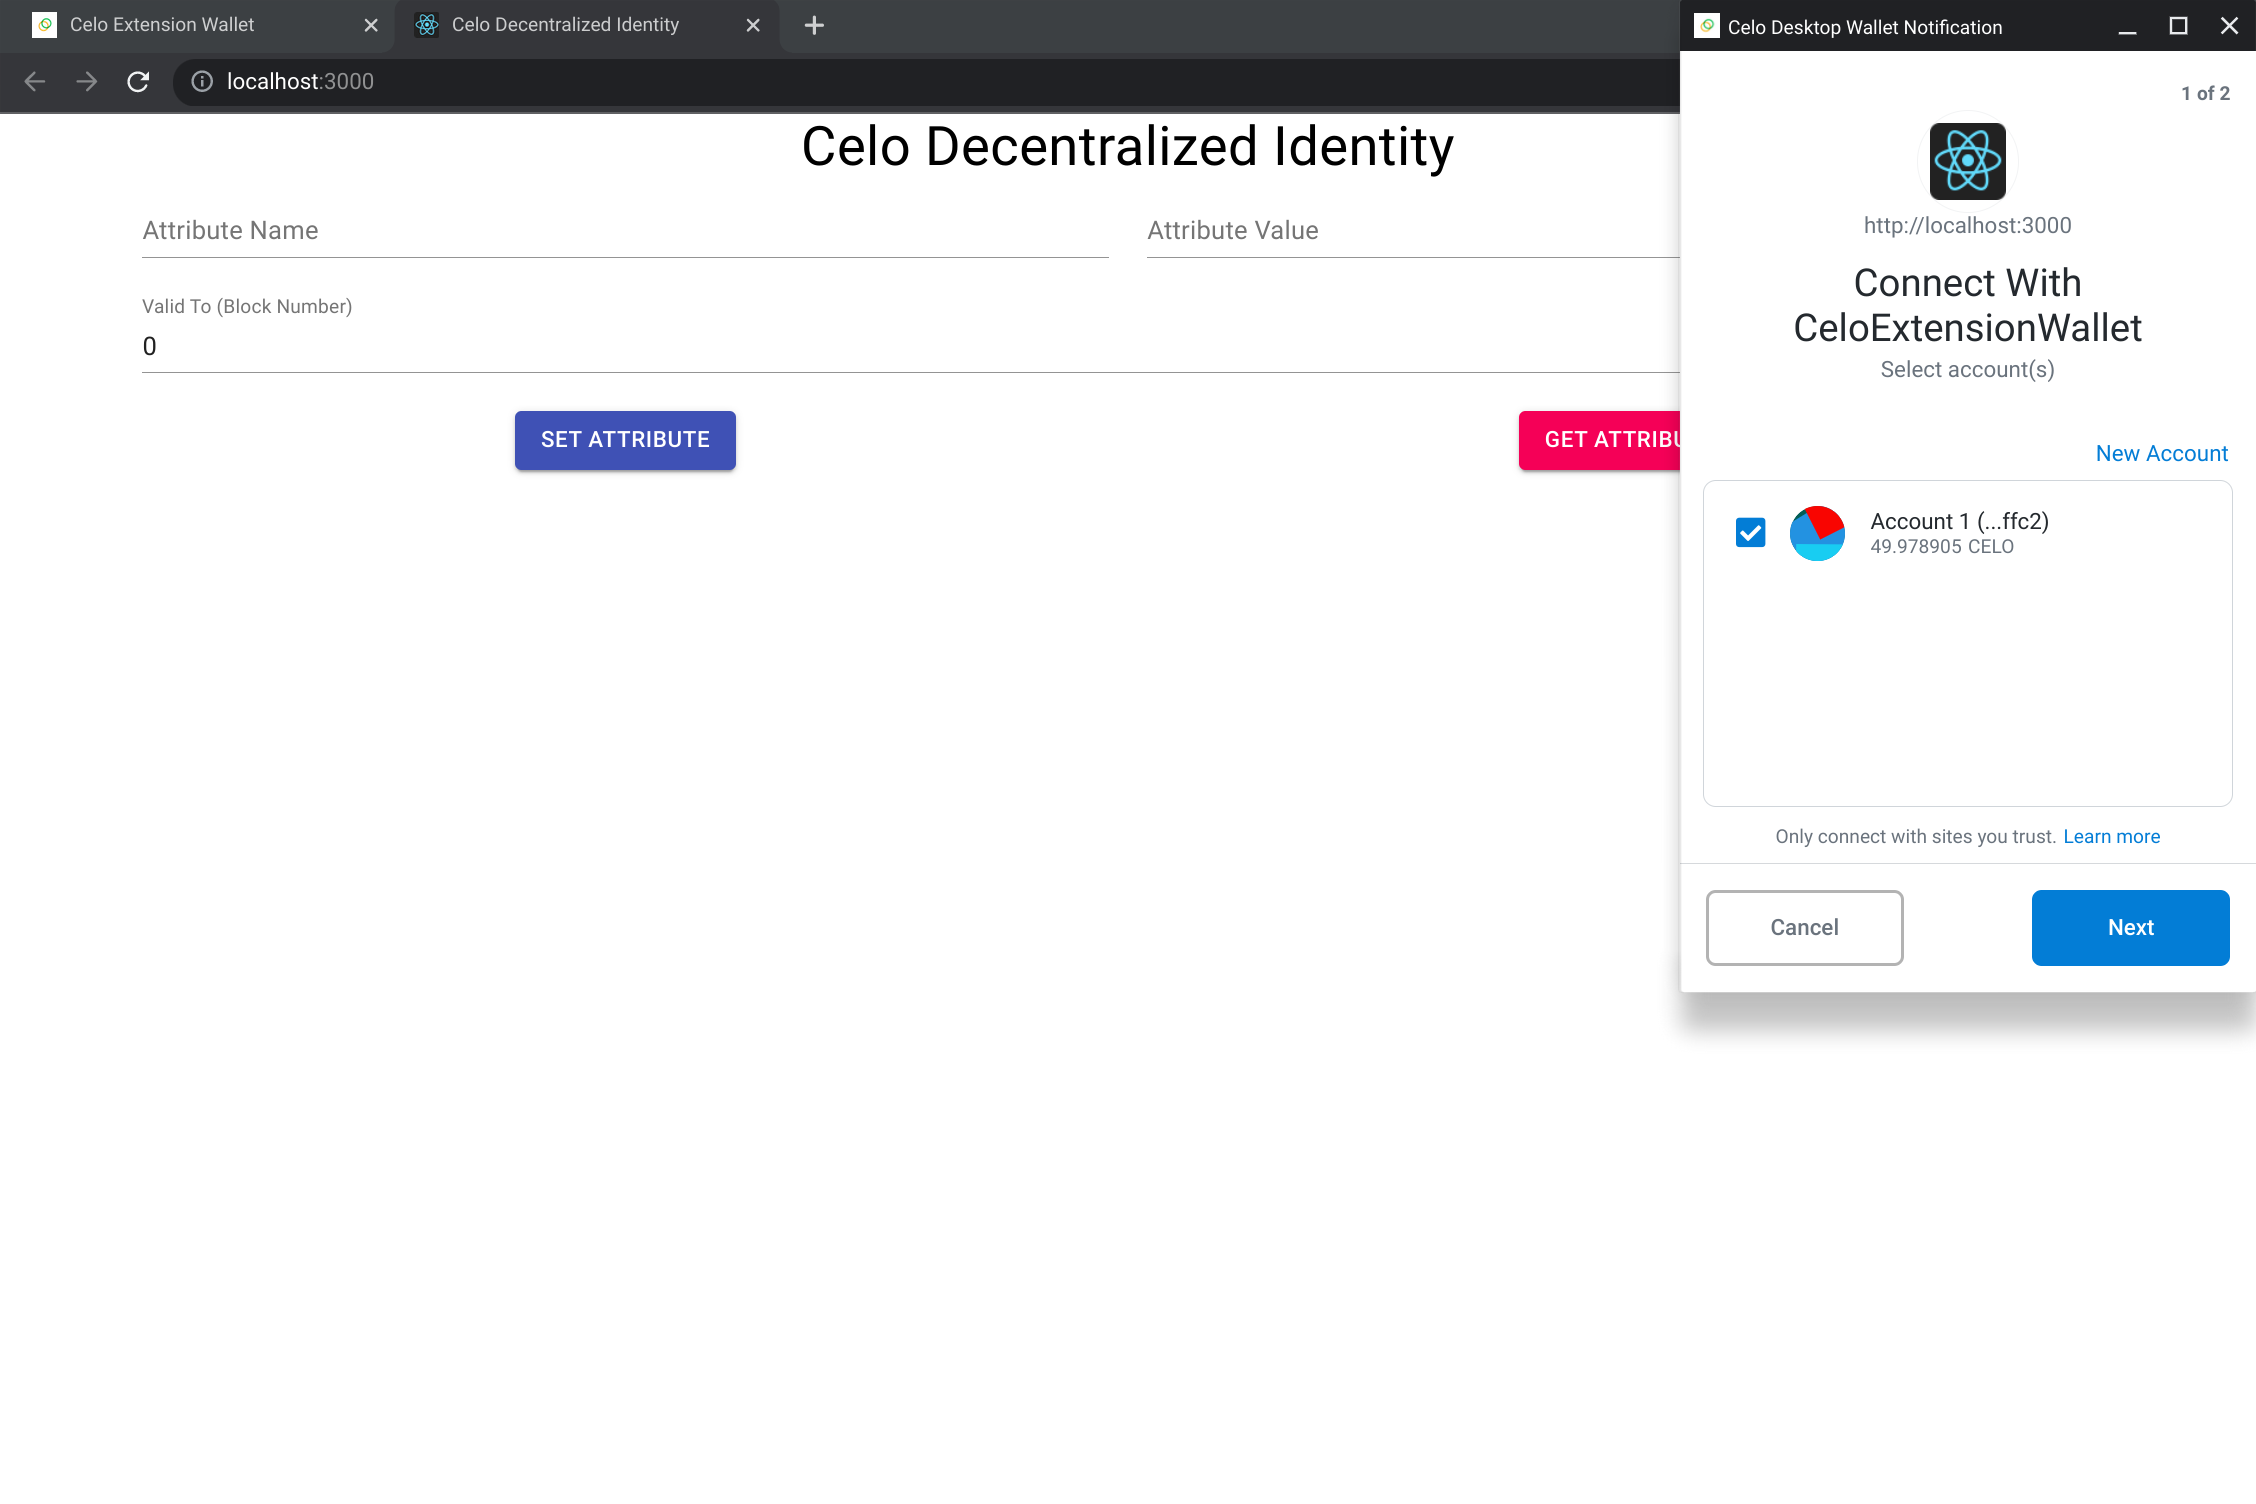
- In the app, fill in the form fields to set and get attributes associated with your decentralized identity.
Note: Before setting attributes, ensure that you have deployed the DIDRegistry smart contract to the Celo test network and updated the DIDRegistry.json file in the build/contracts directory with the deployed contract address. Also, ensure that you have updated the privateKey and accountAddress variables in the truffle-config.js file with your own private key and MetaMask account address, respectively.
Conclusion
In this tutorial, we have explored how to create a decentralized identity solution using the Celo blockchain. We have covered concepts such as decentralized identifiers (DIDs), verifiable credentials, and identity management, and demonstrated how to implement these features in a Celo-based application. We have also learned how to deploy a DID registry smart contract to the Celo network and build a simple web application to interact with the contract.
Decentralized identity is an important use case for blockchain technology, and Celo offers a secure and accessible platform for developing such solutions. By leveraging the power of DIDs and verifiable credentials, developers can build applications that empower users to take control of their digital identities and protect their personal data.
Next Steps
Decentralized identity is an important use case for blockchain technology, and Celo offers a secure and accessible platform for developing such solutions. To further explore decentralized identity on Celo, consider these follow-up resources:
Explore the Celo Developer Documentation to learn more about the platform and its features.
Check out the Decentralized Identifiers (DIDs) Specification and the W3C Verifiable Credentials Data Model to gain a deeper understanding of these concepts.
Experiment with different types of identity attributes and explore ways to use them in your applications.
Join the Celo community on Discord and collaborate with other developers to build innovative decentralized identity solutions.
About The Author
Oluwalana is a blockchain developer and technical writer with expertise in building decentralized applications on various platforms, including Ethereum and Celo. With a passion for sharing knowledge, Oluwalana has written numerous technical tutorials and articles on blockchain and other emerging technologies.
As an analog-by-birth and digital-by-nature individual, Oluwalana leverages a unique perspective to craft compelling stories and thought-provoking content that engages readers and inspires action. When not coding or writing, Oluwalana enjoys playing video games and exploring new technologies.
Follow Oluwalana on Twitter for more insights and updates on the latest in blockchain and emerging technologies.
References
Here are some helpful resources and references used in creating this tutorial: