
Introduction
Blockchain technology has the potential to reshape many industries by offering unprecedented levels of transparency, security, and decentralization. The music industry, which has historically been dominated by intermediaries, stands to gain significantly from this technology. In this tutorial, we will explore how to build a decentralized music streaming service using the Celo blockchain. We’ll demonstrate how smart contracts can be used to manage music tracks, rights, and royalties, and how InterPlanetary File System (IPFS) can facilitate decentralized storage of music files. We will utilize Solidity, JavaScript, React, Node.js, and Python to achieve our goals.
Prerequisites
To follow along with this tutorial, you will need a basic understanding of blockchain technology, smart contracts, and familiarity with programming languages such as Solidity, JavaScript, React, Node.js, and Python. If you are new to Celo or smart contracts, I recommend completing the tutorial “Connect to Celo using hardhat” first. You should also be comfortable with the concepts of decentralized storage and the IPFS.
Requirements
Before proceeding with this tutorial, you will need to have the following tools installed:
- Metamask: This is a browser extension that allows you to interact with the Celo blockchain. Install it here.
- NodeJS: Ensure you have NodeJS version 12.0.1 or higher installed. You can download it from here.
Additionally, you will need access to a Celo client. This tutorial will not cover setting up a Celo node, so please ensure you have access to one.
Setting up the Development Environment
Let’s begin by setting up the development environment. We’ll start by initializing a new Node.js project and then install the necessary dependencies.
# Create a new directory for the project
mkdir celo-music
cd celo-music

# Initialize a new Node.js project and install dependencies
npm init -y
npm install --save express cors dotenv web3 @celo/contractkit ipfs-http-client
The above commands will create a new directory celo-music, navigate into it, initialize a new Node.js project, and then install the following dependencies:
express: A fast, unopinionated, and minimalist web framework for Node.js.cors: A package for providing a Connect/Express middleware that can be used to enable CORS with various options.dotenv: A zero-dependency module that loads environment variables from a.envfile intoprocess.env.web3: Ethereum JavaScript API which connects to the Generic JSON-RPC spec.@celo/contractkit: A lightweight wrapper around Web3.js for Celo.ipfs-http-client: A client library for the IPFS HTTP API, implemented in JavaScript.
Setting up the Project
-
Create a new directory for the project and navigate to it in your terminal:
mkdir celo-music cd celo-music -
Initialize a new Node.js project and install dependencies:
npm init -y npm install --save @truffle/hdwallet-provider @celo/contractkit dotenv -
Initialize a new Truffle project:
truffle init
Creating the Smart Contract
Let’s proceed by creating the smart contract that will be used for managing music tracks, rights, and royalties.
cd contracts
touch MusicStream.sol
Next, open the MusicStream.sol file and insert the subsequent code:
// SPDX-License-Identifier: MIT
pragma solidity ^0.8.0;

contract MusicStream {
    struct Track {
        uint256 id;
        string name;
        string artist;
        string ipfsHash;
    }

    mapping(uint256 => Track) public tracks;
}
This code lays the foundation for our smart contract. The MusicStream contract defines a Track struct that represents a music track, which includes an id, name, artist, and an ipfsHash. The ipfsHash will be used to fetch the music file from IPFS. The contract also declares a public tracks mapping that maps a track’s id to a Track struct.
Let’s proceed by adding some functionality to this contract. First, we need a way to add new tracks. For that, we’ll create a createTrack function.
// inside the MusicStream contract
uint256 public nextTrackId = 1;

function createTrack(string calldata name, string calldata artist, string calldata ipfsHash) public {
    tracks[nextTrackId] = Track(nextTrackId, name, artist, ipfsHash);
    nextTrackId++;
}
The createTrack function takes the name, artist, and ipfsHash of a track and stores it in the tracks mapping. The id of the track is determined by the nextTrackId state variable.
Now, let’s provide a function to fetch details about a track using its id.
// inside the MusicStream contract
function getTrack(uint256 id) public view returns (uint256, string memory, string memory, string memory) {
    Track storage track = tracks[id];
    return (track.id, track.name, track.artist, track.ipfsHash);
}
The getTrack function accepts a track id and returns the id, name, artist, and ipfsHash of the track.
This is what the smart contract should look like:
// SPDX-License-Identifier: MIT
pragma solidity ^0.8.0;
contract MusicStream {
    struct Track {
        uint256 id;
        string name;
        string artist;
        string ipfsHash;
    }
    mapping(uint256 => Track) public tracks;
    uint256 public nextTrackId = 1;
    function createTrack(string calldata name, string calldata artist, string calldata ipfsHash) public {
        tracks[nextTrackId] = Track(nextTrackId, name, artist, ipfsHash);
        nextTrackId++;
    }
    function getTrack(uint256 id) public view returns (uint256, string memory, string memory, string memory) {
        Track storage track = tracks[id];
        return (track.id, track.name, track.artist, track.ipfsHash);
    }
}
Compiling and Deploying the Smart Contract to the Celo Test Network
-
Create a new file
migrations/2_deploy_music_stream.jsand add the following code:const MusicStream = artifacts.require("MusicStream"); module.exports = function (deployer) { deployer.deploy(MusicStream); }; -
Update the
truffle-config.jsfile to include the Celo-Alfajores network configuration:const ContractKit = require("@celo/contractkit"); const Web3 = require("web3"); const web3 = new Web3("https://alfajores-forno.celo-testnet.org"); const kit = ContractKit.newKitFromWeb3(web3); // Add your private key and account address const privateKey = "your_private_key"; const accountAddress = "your_account_address"; kit.addAccount(privateKey); module.exports = { networks: { development: { host: "127.0.0.1", port: 7545, network_id: "*" }, alfajores: { provider: kit.connection.web3.currentProvider, network_id: 44787, from: accountAddress, gas: 6721975, gasPrice: 20000000000, }, }, compilers: { solc: { version: "0.8.0", }, }, }; -
Compile the smart contract
Run the following command to compile the smart contract:
truffle compile -
Deploy the smart contract to the Celo network
Run the following command to deploy the
MusicStreamsmart contract to the Celo network:truffle migrate --network alfajores

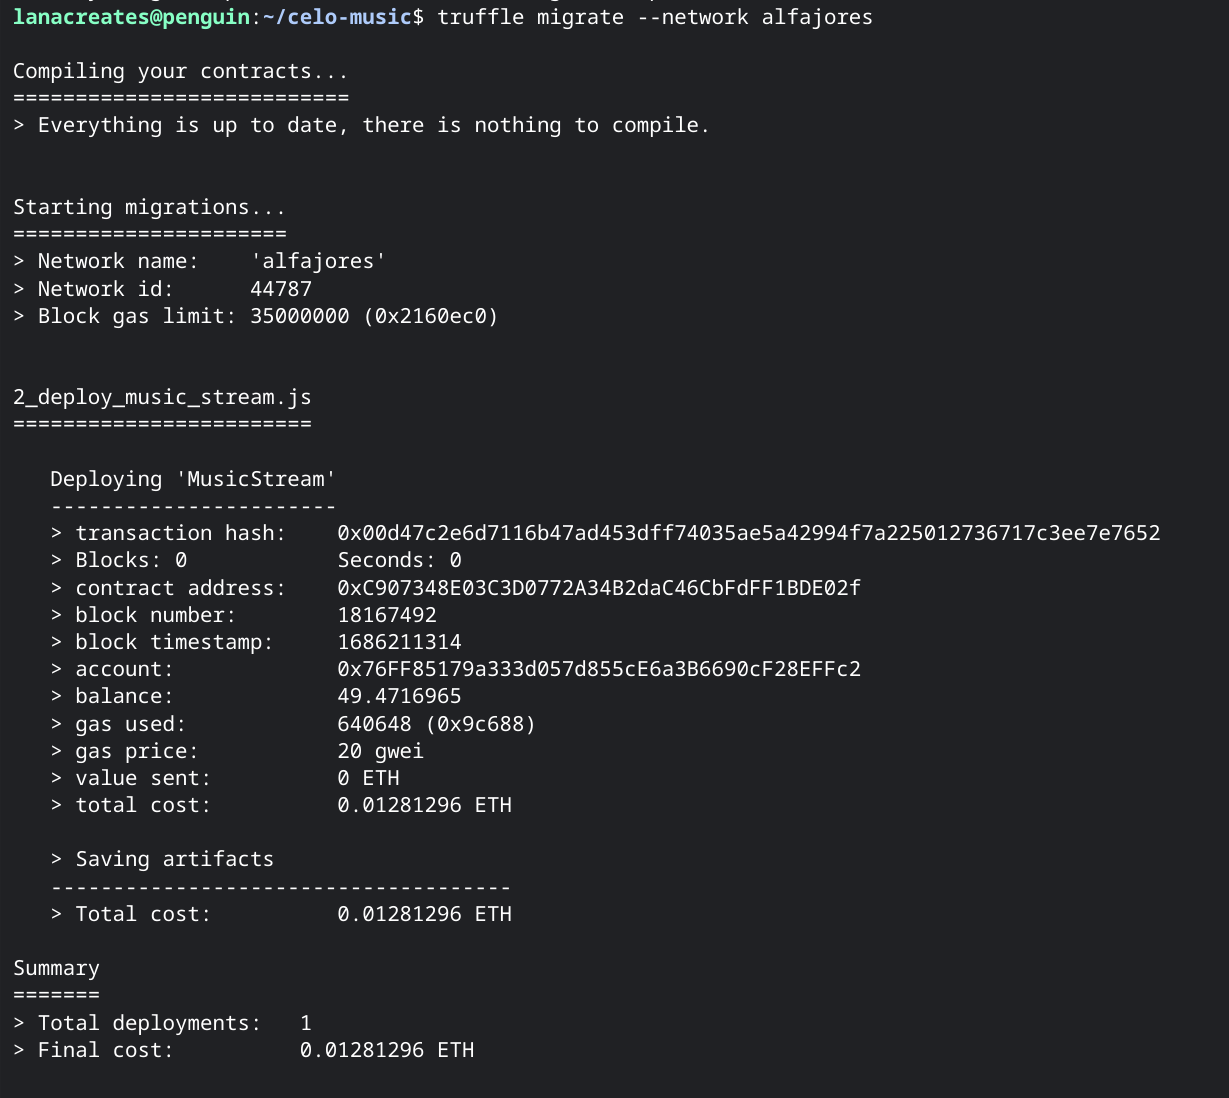
After the script has successfully executed, it will print the address of the deployed contract. Make sure to note down this address, as we’ll need it in the next steps.
Setting up Infura for IPFS Integration
Before we further dive into the code, it’s essential to set up an Infura account and create a project. Infura is a popular service that provides access to Ethereum and IPFS networks without having to set up and maintain your own infrastructure. We’ll be using Infura to interact with the IPFS network in this tutorial.
Follow these steps to create an Infura account and obtain your API key and API secret:
- Sign up for an Infura account: Head over to Infura’s website and click on “Get Started For Free” to sign up for a new account. You can create an account using your email address or sign up with your Google, GitHub, or Twitter account.
- Create a new project: After signing in to your account, you’ll be directed to the Infura Dashboard. Click on “Create New Project” to start a new project.
- Enter project details: Give your project a name and select the “Ethereum and IPFS” option to enable both Ethereum and IPFS services. Click on “Create” to finalize the project.
- Obtain your API key and API secret: You will now be taken to the project’s settings page. In the “Keys” section, you’ll find your
API_KEYandAPI_KEY_SECRET. You’ll need these for your application to interact with the IPFS network.
Interfacing with the Smart Contract
Having successfully deployed our smart contract, the next logical step involves communicating with it. In order to carry out operations such as creating a new music track or fetching existing tracks, we’ll have to establish this interaction. To do this, we’ll need to use the ContractKit we’ve already set up.
Let’s commence by writing the JavaScript code that will enable us to connect to our deployed MusicStream contract:
cd ..
touch interact.js
Inside the interact.js file, paste the following code:
require('dotenv').config();
const Web3 = require('web3');
const ContractKit = require('@celo/contractkit');
const MusicStream = require('../build/contracts/MusicStream.json');

const web3 = new Web3(process.env.CELO_RPC_URL);
const kit = ContractKit.newKitFromWeb3(web3);

const connectToContract = async () => {
    const accounts = await web3.eth.getAccounts();
    const musicStreamContract = new web3.eth.Contract(MusicStream.abi, process.env.CONTRACT_ADDRESS);

    return {
        contract: musicStreamContract,
        defaultAccount: accounts[0]
    };
};
Here, we’re using the ContractKit to create a connection to our MusicStream contract deployed on the Celo network. We’re passing our contract’s ABI (Application Binary Interface), which describes how to interact with the contract, and the contract’s address to the web3.eth.Contract function.
Next, let’s use this connection to interact with our contract. Add the following function to create a new track:
const createTrack = async (name, artist, ipfsHash) => {
    const { contract, defaultAccount } = await connectToContract();

    const createTrackResult = await contract.methods.createTrack(name, artist, ipfsHash).send({ from: defaultAccount });

    console.log('Track created with ID:', createTrackResult.events.TrackCreated.returnValues.id);
};
Here, we’re invoking the createTrack function in our contract. Notice that we pass name, artist, and ipfsHash as arguments, which are the details of the new track. The function also specifies who the transaction is ‘from’, which in this case is the defaultAccount.
Similarly, we can interact with the contract to fetch details of a track. For this, add the following function:
const getTrack = async (id) => {
    const { contract } = await connectToContract();

    const track = await contract.methods.getTrack(id).call();

    console.log(`Track ${id}:`, track);
};
In this function, we’re calling the getTrack method of our contract, which accepts a track id and returns the details of the corresponding track.
With this, we have established a basic interaction with our smart contract. We can add, retrieve, and manipulate music tracks as needed for our decentralized music streaming service.
In the next section, we’ll integrate IPFS to handle storage of the actual music files in a decentralized manner.
Incorporating IPFS
IPFS, short for InterPlanetary File System, is a protocol and network devised to craft a content-addressable, peer-to-peer technique for storing and sharing hypermedia in a distributed file system. In our context, we’ll utilize IPFS for the decentralized storage of our music files.
Our first task is to install the IPFS HTTP client library. Open your terminal and execute the following command:
npm install ipfs-http-client
Now, let’s go ahead and construct a utility function to upload files to IPFS. Firstly, import the ipfs-http-client at the top of our interact.js file:
const IPFS = require('ipfs-http-client');
const ipfs = IPFS.create({ host: 'ipfs.infura.io', port: '5001', protocol: 'https' });
Next, we define the function that will upload our files:
const addToIPFS = async (file) => {
    const { path } = await ipfs.add(file);
    return path;
};
This addToIPFS function accepts a file, adds it to IPFS, and then returns the IPFS hash of the file. This hash is a unique identifier for the file in the IPFS network.
With IPFS integrated, let’s adjust our createTrack function in interact.js to handle music file uploads. The updated function should look like this:
const createTrack = async (name, artist, musicFile) => {
    const { contract, defaultAccount } = await connectToContract();

    console.log('Uploading file to IPFS...');
    const ipfsHash = await addToIPFS(musicFile);
    console.log('File uploaded, IPFS Hash:', ipfsHash);

    const createTrackResult = await contract.methods.createTrack(name, artist, ipfsHash).send({ from: defaultAccount });

    console.log('Track created with ID:', createTrackResult.events.TrackCreated.returnValues.id);
};
Here, we first upload the music file to IPFS and get its hash. Then, we pass this hash along with the track name and artist to the createTrack function in our smart contract. This way, our smart contract keeps a record of all the music tracks and their corresponding IPFS hashes.
Next, we’ll build a simple web interface for users to interact with our decentralized music streaming service.
Building a Front-End Interface with React
For the front-end of our application, we’ll use React, a popular JavaScript library for building user interfaces. React will help us build a simple and intuitive interface for users to interact with our decentralized music streaming service.
Let’s start by installing React and setting up a new project:
npx create-react-app musicstream
This will create a new directory named musicstream with a basic React application. Navigate into the directory:
cd musicstream
Before proceeding, let’s install a couple more dependencies that we’ll need:
npm install axios @celo/contractkit web3
With React and all necessary dependencies installed, we can start building our front-end.
After successfully installing React and all necessary dependencies, we are set to build our front-end. We need two main components for our application: a form to allow users to upload new music tracks and a list that displays all the available tracks.
Let’s begin by focusing on the upload form. Create a new file named UploadForm.js in the src folder and populate it with the following code:
import React, { useState } from 'react';
import axios from 'axios';

const UploadForm = ({ onUpload }) => {
    const [trackName, setTrackName] = useState('');
    const [artistName, setArtistName] = useState('');
    const [file, setFile] = useState();

    const onSubmit = async (e) => {
        e.preventDefault();

        const formData = new FormData();
        formData.append('file', file);
        const { data } = await axios.post('/api/upload', formData, {
            headers: {
                'Content-Type': 'multipart/form-data',
            },
        });
        onUpload(trackName, artistName, data.ipfsHash);
    };

    return (
        <form onSubmit={onSubmit}>
            <label>
                Track Name:
                <input type="text" value={trackName} onChange={(e) => setTrackName(e.target.value)} required />
            </label>
            <label>
                Artist Name:
                <input type="text" value={artistName} onChange={(e) => setArtistName(e.target.value)} required />
            </label>
            <label>
                File:
                <input type="file" onChange={(e) => setFile(e.target.files[0])} required />
            </label>
            <button type="submit">Upload</button>
        </form>
    );
};

export default UploadForm;
This is a simple form that includes input fields for the track name, artist name, and file. When the form is submitted, it sends a POST request to our server with the file data. It then passes the track name, artist name, and returned IPFS hash to the onUpload prop.
Next, let’s handle the component that will display the list of existing music tracks.
Create a new file named TrackList.js inside the src folder, and include the following code:
import React from 'react';

const TrackList = ({ tracks }) => {
    return (
        <div>
            {tracks.map((track) => (
                <div key={track.id}>
                    <h2>{track.name}</h2>
                    <h3>by {track.artist}</h3>
                    <audio controls>
                        <source src={`https://ipfs.infura.io/ipfs/${track.ipfsHash}`} type="audio/mpeg" />
                    </audio>
                </div>
            ))}
        </div>
    );
};

export default TrackList;
This component receives an array of track objects and renders an audio player for each one. It uses the IPFS hash to fetch the audio file from IPFS.
Finally, let’s bring it all together in App.js:
import React, { useEffect, useState } from 'react';
import axios from 'axios';
import UploadForm from './UploadForm';
import TrackList from './TrackList';

const App = () => {
    const [tracks, setTracks] = useState([]);

    useEffect(() => {
      const gatherTracks = async () => {
          try {
              const response = await axios.get('/api/tracks');
              setTracks(response.data);
          } catch (err) {
              console.error(err);
          }
      };
      gatherTracks();
  }, []);


    const manageUpload = async (name, artist, ipfsHash) => {
        const response = await axios.post('/api/tracks', { name, artist, ipfsHash });
        setTracks((prevTracks) => [...prevTracks, response.data]);
    };

    return (
        <div>
            <UploadForm onUpload={manageUpload} />
            <TrackList tracks={tracks} />
        </div>
    );
};

export default App;
Testing the Decentralized Music Streaming Application
After implementing the smart contract, integrating IPFS, and building the front-end using React, it’s time to test our decentralized music streaming service. Start your React application by running the following command in the terminal:
npm start
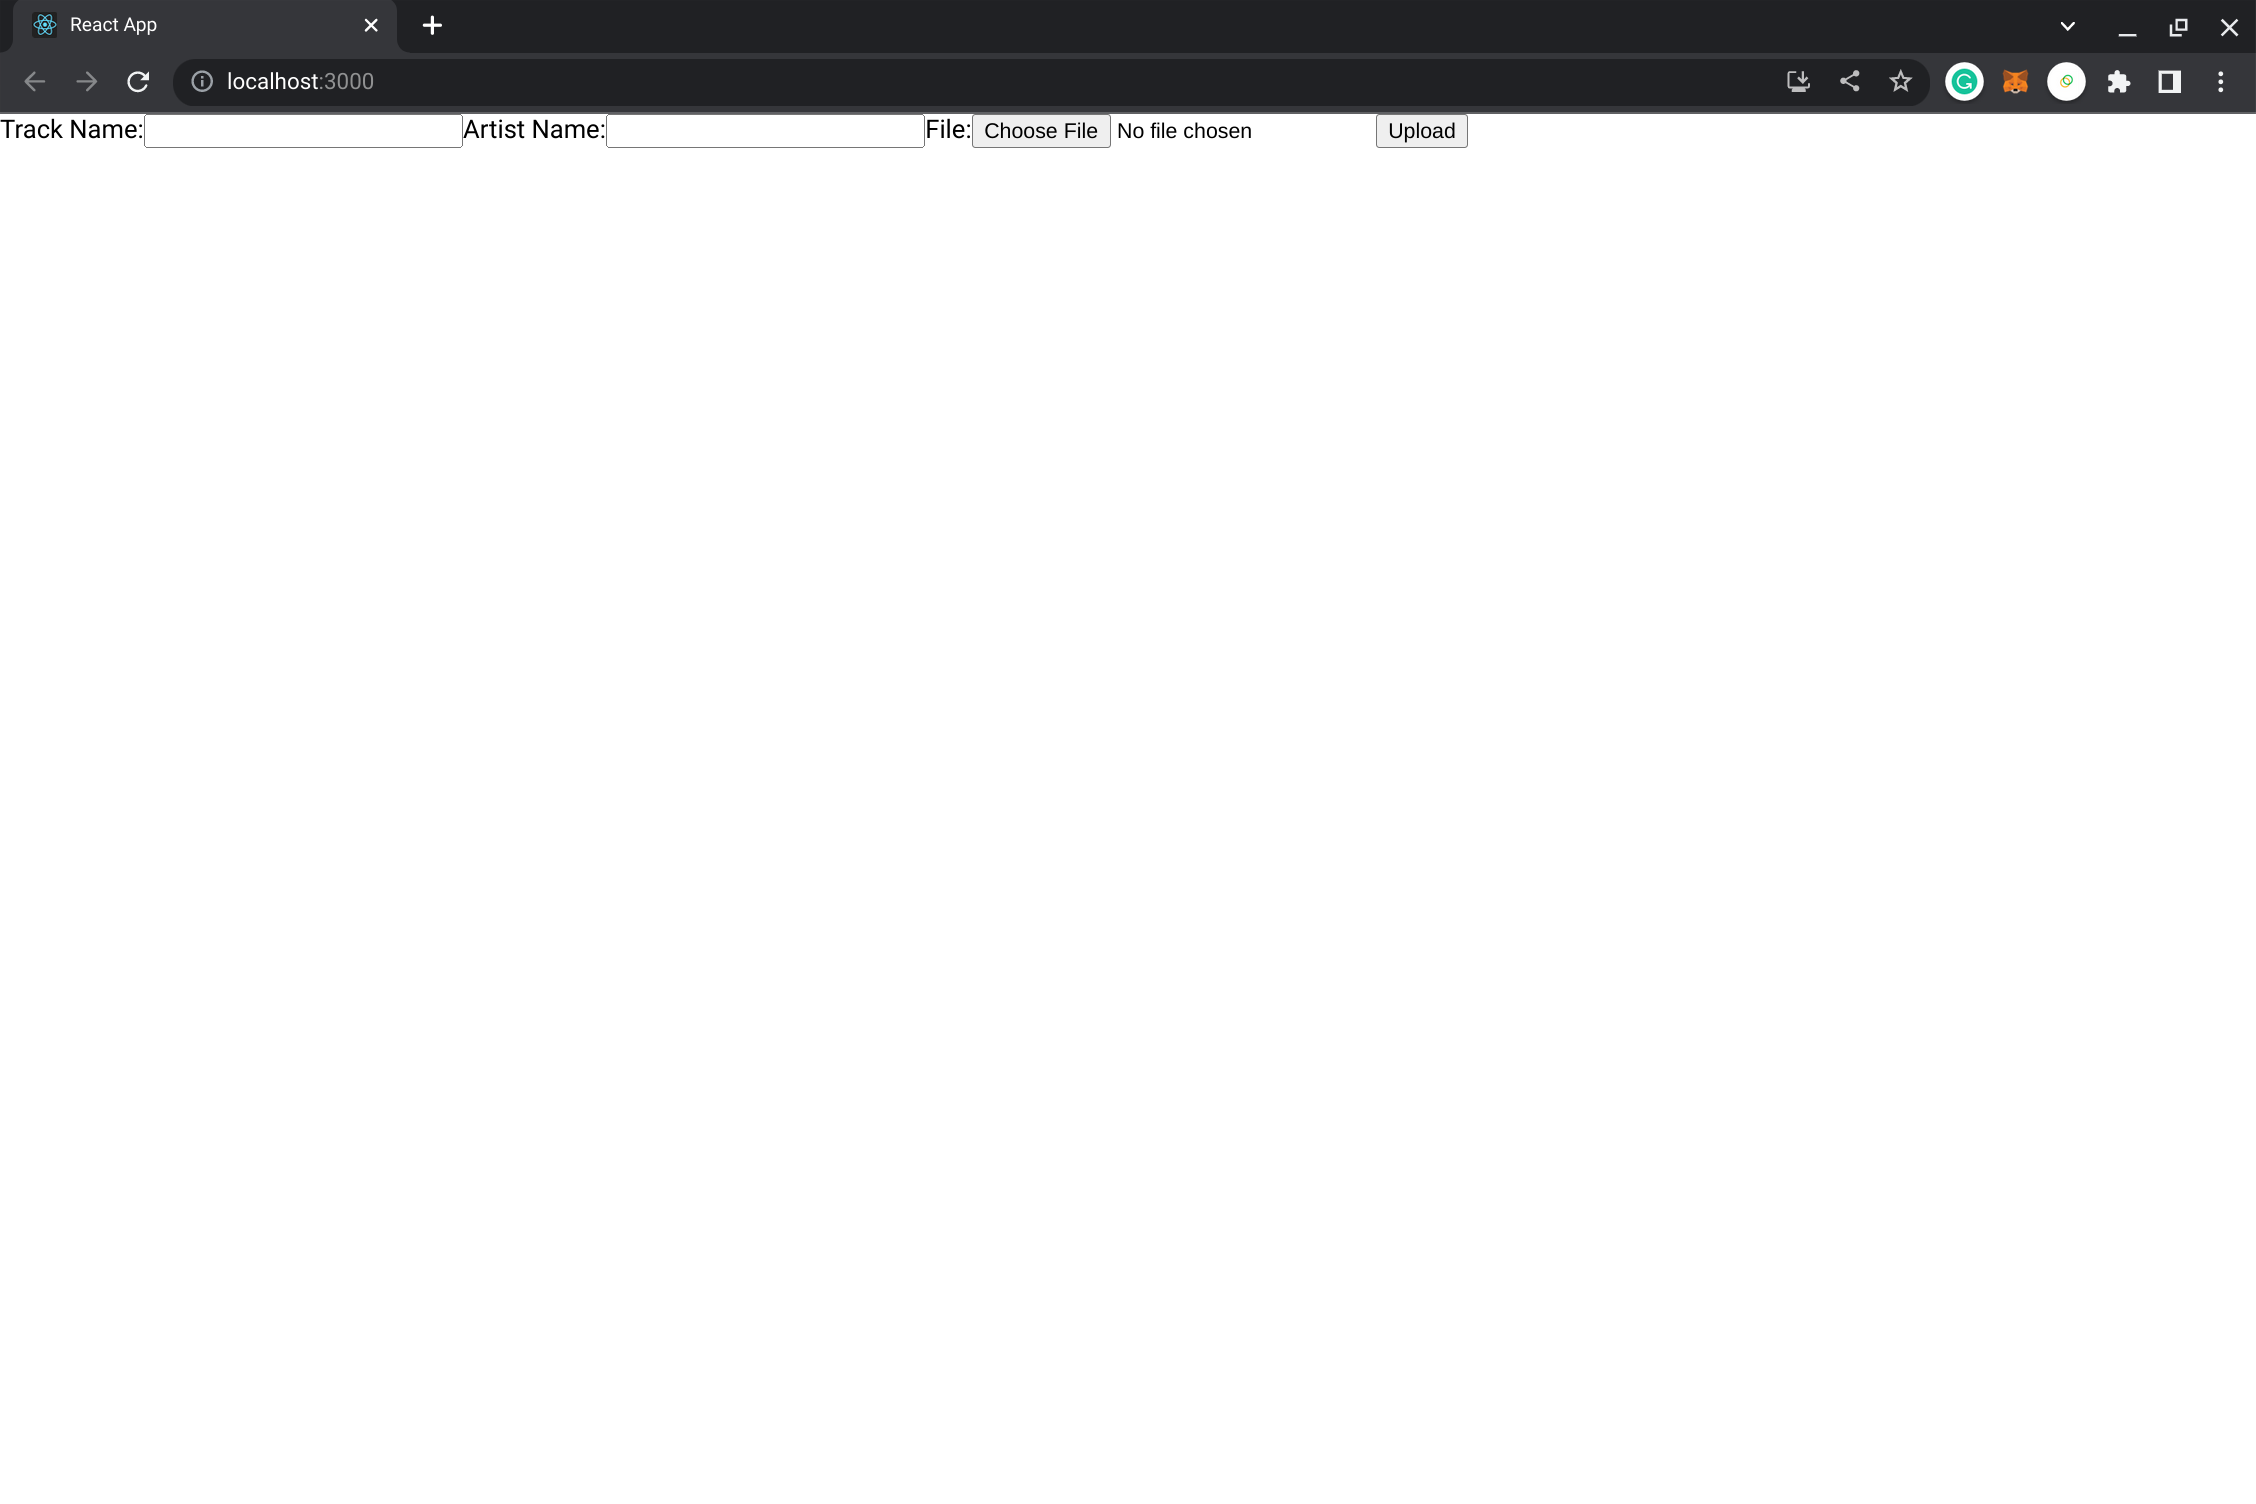
This command starts the React development server and opens your app in a new browser tab. If it doesn’t, navigate to http://localhost:3000 in your browser.
You should see the upload form where you can add a new track. Fill in the track name, artist name, and select an mp3 file to upload. Click the Upload button to submit the form.

The track should appear in the list below the form, and you should be able to play it directly in the browser.
Behind the scenes, when you submit the form, the mp3 file is uploaded to IPFS, and a new track is added to the smart contract with the IPFS hash of the file. When the page loads, it fetches all the tracks from the smart contract and displays them in a list.
Try uploading a few more tracks and refresh the page to ensure that they persist.
Congratulations! You have now built and deployed a decentralized music streaming service on the Celo blockchain.
Conclusion
In this tutorial, we have successfully built a decentralized music streaming service on the Celo blockchain. We started by writing a smart contract to manage music tracks, and then we integrated IPFS for decentralized file storage. Finally, we
built a React front-end to interact with the smart contract and play music tracks directly in the browser. This is just one example of how blockchain technology can be used to disrupt traditional industries and create more equitable systems.
Next Steps
To continue exploring blockchain development, consider the following:
- Extend the music streaming service to support more features such as artist profiles, playlists, and likes.
- Experiment with different blockchain networks and smart contract platforms.
- Dive deeper into IPFS and explore its other uses in decentralized applications.
About the Author
Oluwalana is a blockchain developer and technical writer, experienced in creating decentralized applications on Ethereum and Celo platforms. With a passion for knowledge-sharing, Oluwalana has authored various tutorials and articles on blockchain and other emerging technologies. Follow me on Twitter for insights on blockchain and emerging tech. For professional inquiries, kindly connect witth me on LinkedIn and explore my work on GitHub.